A quick note: This article deals with properly installing an LED circuit in an action figure, and talks about how the electricity in a circuit flows (such as with the positive and negative sides of wires, etc.). It does not teach you how to solder said LED circuit. If you need to learn how to solder, please refer to my other tutorial here which talks specifically, and in detail, how to solder. Thank you.
So, installing LED’s. It can really give some extra value to a custom, if you can make a part of the figure light up. For some characters, it’s almost essential. Here, I’ll teach you how to set up a circuit, and how to make it fit inside of an action figure to make it light up. I’ll even teach you how to make a removable battery compartment on the back for easy access to changing out the battery.
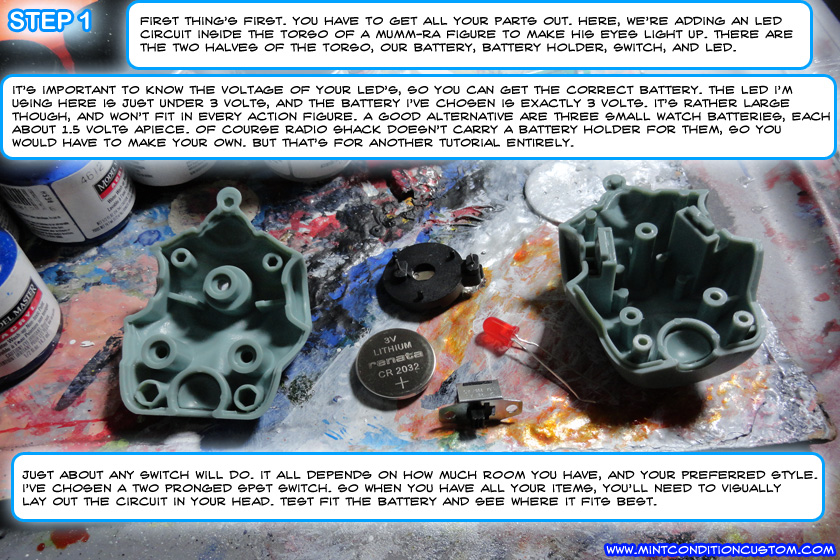
What you’ll need for this tutorial: an led, some wire, a switch, a battery, a battery holder, a dremel, supplies to solder, a lo-temp hot glue gun, and some two-part epoxy resin.
Alright, ready to get started? Let’s begin!
And that’s the end of the guide. I hope it helps!


